Automating the resizing of images
Windows folder resizer
Tips: words in [] like [Save] represent buttons, words in {} like {enter} represent keyboard keys or browser actions
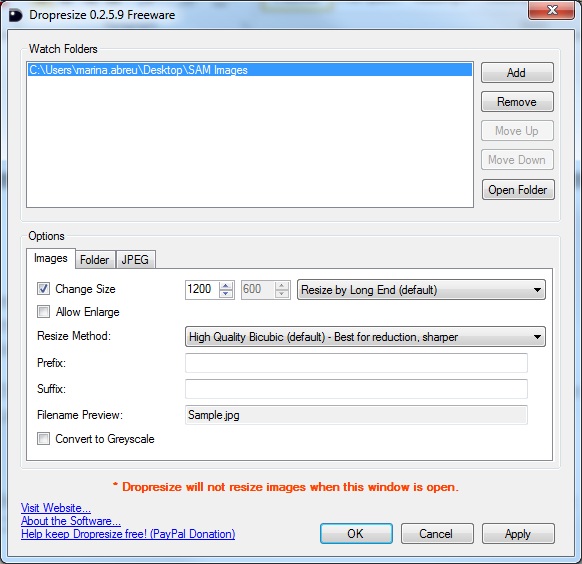
- Dropresize is a lightweight Windows utility that allows you to resize images by simply dragging or copying them to a monitored folder. Every time you copy a new image file to this folder, Dropresize automatically resizes it, of course, based on your very own resizing parameters.
Warning: The images placed in this folder are resized and so can not be un-resized. - The process is usually performed instantly, but this also depends on the overall number of photos selected by the user.
- If using Windows XP need to install Microsoft Fireworks 3.5. Download Here
- Follow the steps to configure your Dropresize:
- Create an empty folder where you will copy the images to be resized
- Download Dropresize : Download Here
- Execute the Dropresize.exe
- On the top right, click on [Add] and select the folder you just created
- On the "Change Size" option, change to 1200 and select "Resize by Long End (default)"
- On the Folder tab you have the option to create a backup folder to keep your original images
- Click on [Apply] and then [Ok]
- Now you can start copying images to your folder.
Mac automator setup to resize images
- The Mac Automator is Apple’s way of automating or simplifying a computer practice known as scripts. To open Automator, open Finder, click Applications, and then double-click Automator.
- How to Setup Folder Actions to Automatically Resize Images in Your Folder (Mac):
- Open Automator. Select “Folder Action” and then [Choose].
- Select the folder that you will copy the images to to be resized
- Select “Photos” from the Library column at the left side of the Automator window, follow by “Scale Images”.
- Drag the “Scale Images” option to the Actions section. You will receive a prompt asking you if you’d like to keep the original file as well as the one that is resized when added. If you’d like to keep the original file as well, click [Add]. If not, click [Don’t Add].
- If you have selected “Add”, you should now see two actions in your Workflow. The first item is labeled “Copy Finder Items”. This is where you select the folder to store the resized images. The second item is the “Scale Images” action where you can specify the size the photos are resized to. On Scale Images select "To Size (pixels)" and inform 1200
- Lastly, save this workflow. Now, whenever an image file is saved to that folder, it will be resized to the size you specified.
Removing the Folder Action (Mac)
- If the Folder Action is not working for you, here are the steps to remove it from your setup.
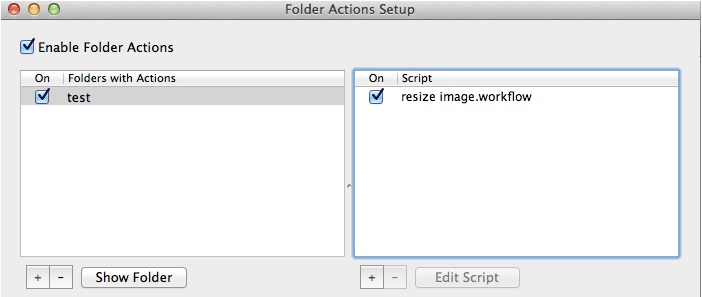
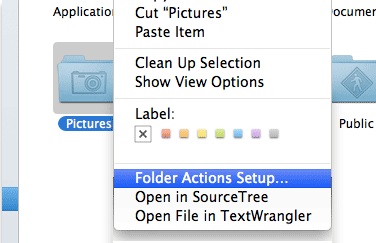
- Open the Finder and navigate to the folder where you have attached the Folder Action to. Right click and select “Folder Action Setup”.
- In the window that show up, you can either disable “Folder Action” altogether, remove this folder from the Folder Action, or remove the Folder Action from this folder. In most cases, clicking the “-” button at the bottom of the screen will delete the folder action attached to this folder.